Using the General Settings in Cool Timeline Pro you can manage basic options for your timeline stories like Custom slug of timeline stories, media display, and more.
Follow the steps below:
- From your WordPress dashboard, navigate to Timeline Addons > Timeline Settings > General Settings.
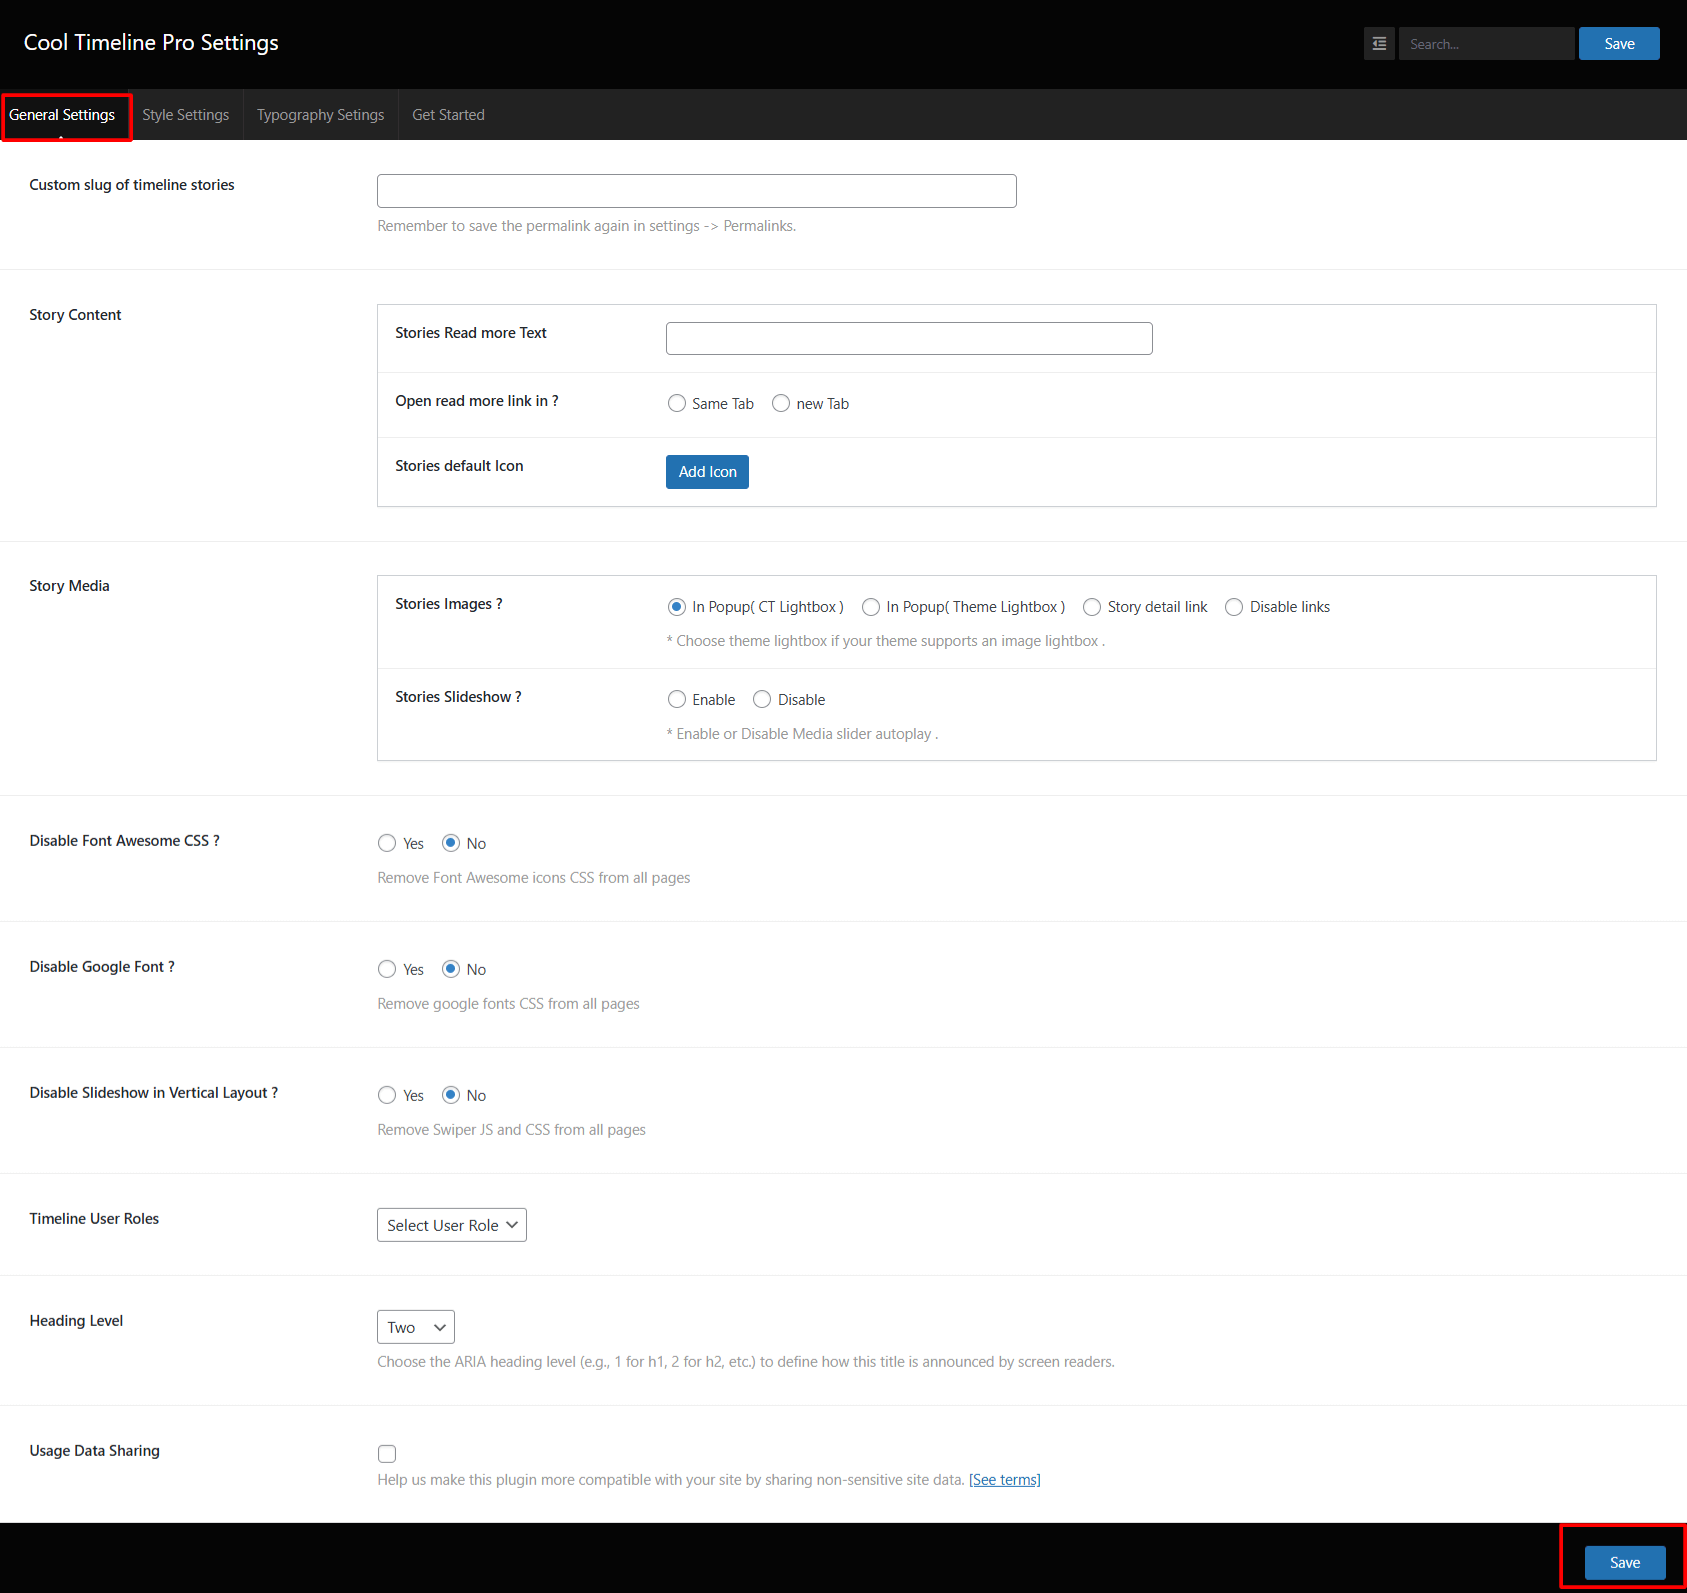
- Custom Slug of Timeline Stories: You can set a custom URL slug for your timeline stories.
- Story Content:
- Stories Read More Text: Add the custom text you want to display for your “Read More” button.
- Open Read More Link In: Choose whether the link opens in the same tab or a new tab.
- Stories Default Icon: Select an icon to display beside your timeline stories by default.
- Story Media:
- Stories Images: Choose how story images open in Popup (CT Lightbox), in Popup (Theme Lightbox), Story Detail Page, or Disable links completely.
- Stories Slideshow: Enable or disable a slideshow for story media.
- Disable Font Awesome CSS: If your theme already includes Font Awesome, you can select Yes to disable it in Cool Timeline and avoid duplicate CSS loading.
- Disable Google Font: Select Yes if you don’t want Cool Timeline to load Google Fonts.
- Disable Slideshow in Vertical Layout: Turn off Swiper JS and CSS from pages.
- Timeline User Roles: Choose user roles (like Administrator, Editor, etc.).
- Heading Level: Select the heading tag level (
H1,H2,H3, etc.) for your story titles. - Usage Data Sharing: You can allow the plugin to share non-sensitive site data with the developers to help improve the plugin.
- Lastly, click Save button.