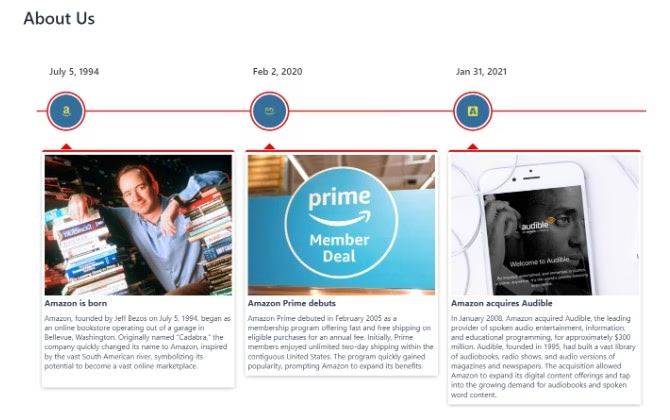
Timeline blocks are mainly used to represent the history of the company on the About Us page of the website so the companies can connect with their users closely. Apart from this, Timeline blocks are also used to show roadmap, personal stories, work experience, and historical events.
Imagine your company has a great history and it can inspire your users, in this case, you can simply create an elegant Timeline Block to let your audience know about the history of your brand.
In this article, we’ll show you how to create stylish vertical and horizontal timelines using the Cool Timeline plugin.
Which one to Choose from Vertical and Horizontal Timeline?
Try to use a Horizontal timeline as it is particularly effective for presenting information in a linear, easy-to-follow format. They work well for websites with wider layouts and are excellent for highlighting a series of events in sequence, and visually appealing manner. Trust me, you will get the best results by implementing it.
A step-by-step guide to Create Vertical & Horizontal Timeline
The simplest method to add an event timeline in WordPress is by using the Cool Timeline plugin. This free plugin lets you create beautiful timelines effortlessly and quickly.
- Install and activate the “Cool Timeline” from the plugins section.
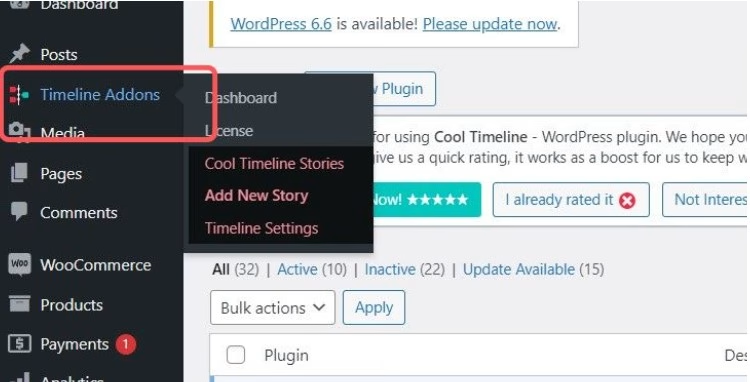
- After activation, you will see the “Timeline Addons” option on the WordPress dashboard. Click on that.
There are two ways to create an event timeline. Let’s first talk about the method that I find easy to use.
First Method
- Go to pages and open a new page.
- Click on the “+”, search Cool Timeline and select “Cool Timeline Block”.
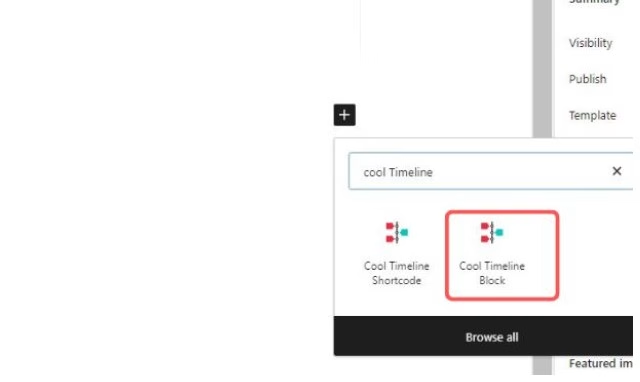
- It will display the Cool Timeline Block with default blocks.
- Now you can simply add the story heading, description, image, and day or date by simply clicking on them.

- From general settings :
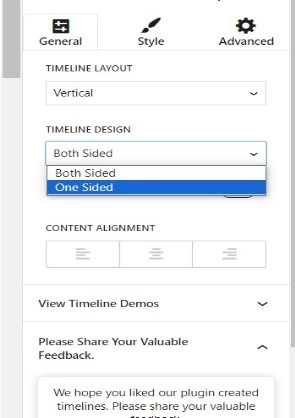
- Buy Pro and select a horizontal layout to create a horizontal timeline otherwise vertical layout will display.
- Select Timeline design and alignment of the content as per your choice.
- In the style section:
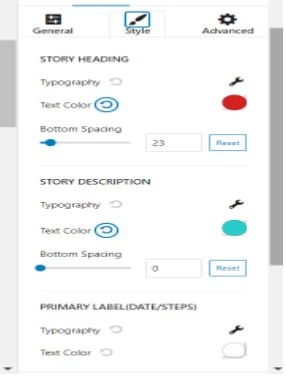
- Adjust the text color of the heading, description, and year labels along with their typography.
- In the advanced section:
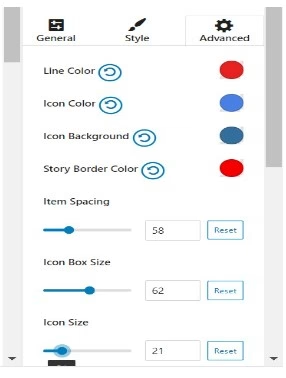
- Set the color of icons, lines, and border and spacing among blocks.
- After making all the changes click on publish and check the preview of the page.
Second Method
Now, let’s move to the second method to create an events timeline.
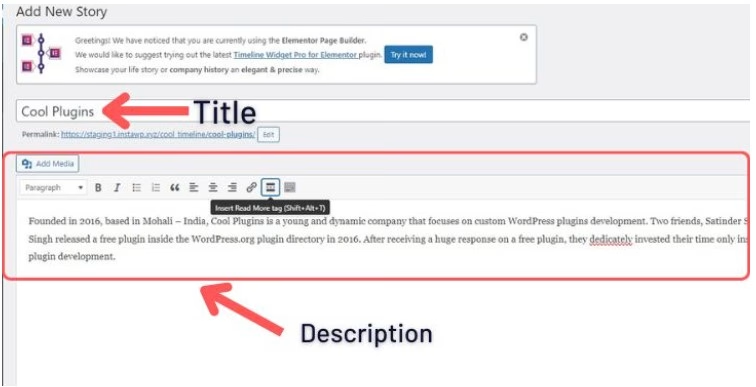
- Under the timeline addons option, click on add story.
- Classic Editor will open, then enter the details of events like enter the story title and description.
- Go to timeline settings to apply the colors to the shortcode block, change the color of text and year labels, and color of the icon or story background. After necessary customization click on save.

- Once you’re done adding events, Cool Timeline will show all of these event stories on the same timeline. You can then add the timeline to any page or post.
- Open the new page and search for Cool Timeline.
- Select Cool Timeline Shortcode.

- From General settings:
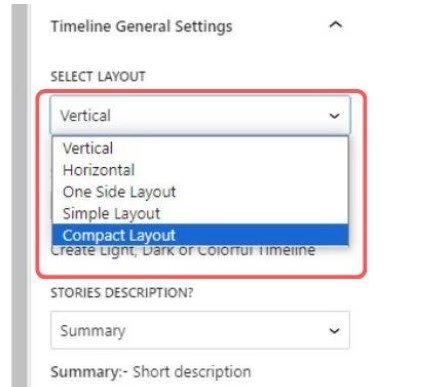
- Select layout: Select the timeline layout from multiple layout options.
- Displays per Page: Set how many stories will be displayed in the timeline. If the number of stories is more than the number you’ve selected pagination will be added to your timeline.
- In Advanced settings:
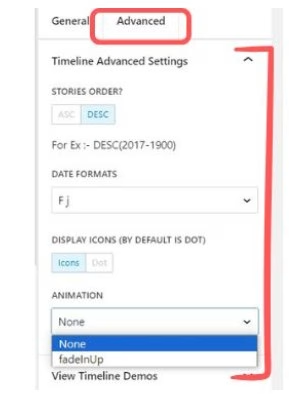
- Stories order: Select the order of events display from ascending or descending order.
- Date format: Controls how the date is formatted.
- Icon: Select Yes if you have set story icons and want them displayed.
- Animation: If you do not want to include animation, click on none or select fade in up to include animation.
- After that update the page and check the preview of the page.
Final Words
By following the steps explained in this guide, you can easily add and customize a vertical and horizontal timeline to your WordPress site. Start representing your stories today and connect with your users in an effective way.